How To Install A Fiberglass Shower Pan -Learn The Easy Way
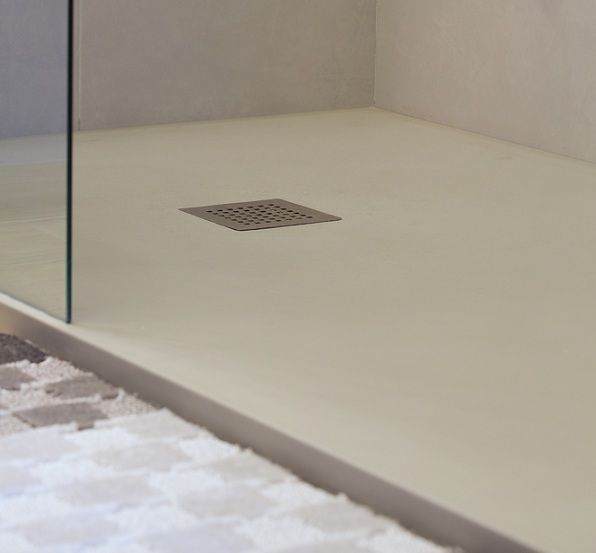
Shower pans are attached to the floor of the shower stall in order to collect the water when you take a shower. Pre-fabricated shower pans are now used as a cheaper alternative way of renovating the bathroom with custom tiles. Shower pans are usually made from fiberglass or acrylic with different sizes and shapes. The installation process of shower pans on the concrete floor is almost the same as tiles but it is easier, lighter and more reasonable.
The shapes, sizes, and designs of the shower pans may vary but the installation process follows some basic steps for all types of shower pans. And you can easily install them in your bathroom spending from $250 to $900 depending on the proficiency of DIYers. You can hire any local professional and complete your installation properly and quickly within four to six hours.
Now let’s see how to install a fiberglass shower pan on a concrete floor step by step.
How to install a fiberglass shower pan
Necessary tools and equipment needed:
If you want to install a fiberglass shower pan, you will need some essential tools aside from the shower pan itself, such as:
- Hammer
- Screwdrivers (Phillips and flathead) and Screws (usually 1.5- 2 inches)
- Tape measure
- Carpenter’s level
- Power drill and drill bits
- Adjustable pliers
- Caulking gun
- Silicone bath caulk
- Framing square
- Washers
- Wooden shims
- Masking tape
- Shims
Here are the Installation Steps
1. Measure the installation space of the new shower pan
Measure the walls that will come in contact with your shower pan and write down the measures. Then buy the shower pan according to this measurement.
The common colors found in the market are white or almond and usually available standard sizes are 36” x 48”, 36” x 42”, 36” x 36”. If you want different sizes or colors rather than these, you have to make a special pre-order.
2. Prepare the selected area for installation
Clean all old adhesive things and loose debris from the surface using mob, vacuum, knife or scraping tools. You may need to take some more measures to prepare the surface if the manufacturers recommend any. Such as applying water seal product and properly dry the water seal. Make sure that there is no water standing on the surface and it is completely dry. The moisture of the floor can affect the adherence of the caulk while sealing.
3. Dry-fitting
Once the surface is fully dry, the thing you need to do is to “dry-fit” the shower pan within this space. Dry-fitting means placing the shower pan in the space without using any fasteners or adhesives to test whether everything is perfect. Make sure that the shower pan fits the space exactly, neither very tight nor too loose to avoid water seepage. Temporary place the pan and walk on it to test the stability.
4. After dry-fitting
now place the shower pan on the base for final installation and properly line it up to the drain components. You have to follow the instructions to attach the drain hardware including the drainpipe, flange, gaskets, and drain body. The drain flange should be attached to the pan adding an extension like a short coupling piece if required. If not so, you have to apply cement and primer to the drain flange and the pipe. Then attach them to the drain in the bathroom floor and apply gaskets on the drain flange when the cement is dried. Now, place the shower pan properly over the drain body. Caulk the drain flange with silicone before you line up the holes of the drain body with the holes of the flange screw. Then you have to press the body of the drain to fit it properly and attach the screen and screw of the drain to the base
5. Leveling the shower pan
In order to drain the water properly while taking a shower, the perfect leveling of the floor is a must. The integrated slope of the base will move water towards the drain. Level the pan using wood shims or carpenter’s level and adjust with shims as needed. The shims help the leveled sitting of the acrylic or fiberglass shower pans by compensating the sloping of the subfloor.
6. Attach the pan
To attach the pan to the studs, mark the center of the studs on each side and drill holes at the pre-given marks. Now use rustproof screws or nails to screw or nail the shower pan into the stud. Check the base level and all the connections before sealing and make sure that there exists no leak.
7. Caulk and seal the pan
Seal all the drilled parts and the holes of the shower pan using silicone bath caulk which is a tight, waterproof seal. To make the pan secure, seal the meeting places of the pan studs.
Acrylic shower pan installation
Installation of acrylic shower pan includes the vacuum-creation process that makes the surface more scratch-resistant, stronger and more durable. The cost of most acrylic and fiberglass shower pans usually ranging from $100 to $1,000. Fiberglass is more reasonable than acrylic shower pans but there is more possibility of scratching and color fading. While acrylic shower pans are more expensive but sustain longer. You will get both types of shower pans in different shapes like round, square, rectangle, etc. The process of acrylic shower pan installation is almost the same as that of fiberglass pans. They differ in price, production materials, durability, the way of cleaning and maintenance.
How to install a shower pan liner
You can use flexible PVC (polyvinyl chloride) or CPE (chlorinated polyethylene) liners as a waterproof membrane under the tile or the shower pan to prevent water-leak into the bathroom walls. To install the liner, place the shower pan liner on the floor flat and overlap it at the corners. Nail the liner into the studs with 8-penny nails. Now fold it over the curb of the shower and nail the liner into the top edge of the shower curb. Nail the shower liner only into the wall studs or the curb.
Now you know the installation procedure of fiberglass or acrylic shower pans and can easily install any of them to make your shower water-tight at a reasonable price.

